
Get Your FREE Woodworking Guide Today!
Wood art projects are an amazing way one can add their home with personality, creativity, and a little craftsmanship. The versatility of this material helps it accommodate seamlessly to many styles—ranging from rustic and traditional to modern and minimal. If you are an experienced woodworker seasoned for years, or even a starter just having the momentum and enthusiasm to enter the colorful world of woodworking, at one point, a project comes to mind that matches the level of skills and aesthetic visions you have pictured. In this article, we are going to look at 10 creative wood art projects that you can do easily in accordance with various décor options in your living space. Hold fast from quickly simple builds to complicated undertakings, hence there is a project for everyone. Each project will be designed to help you turn raw wood into a fine work of art that is truly your one and only.
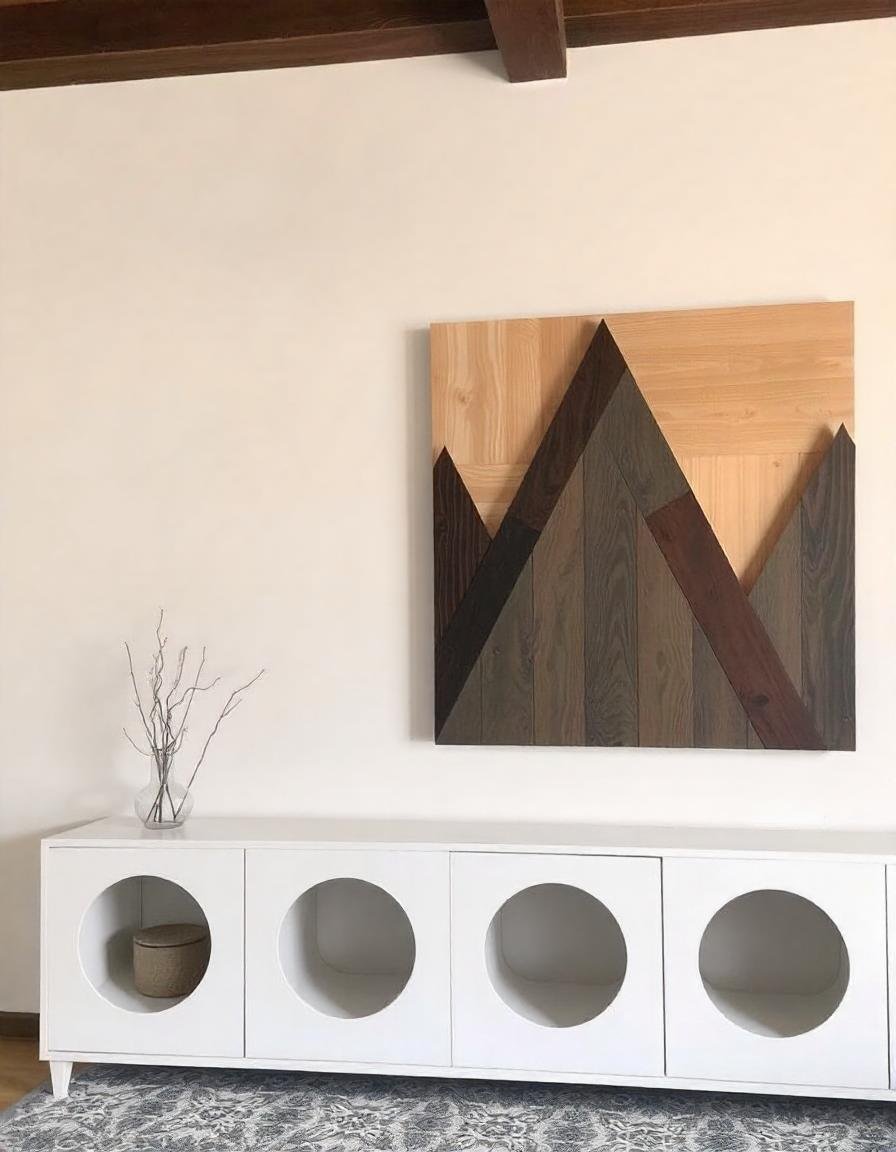
1. Geometric Wall Art
Geometric designs are modern cult home decorations with clean and striking lines and shapes and can make the space feel contemporary and stylish. In this way, by arranging geometric patterns using the wooden pieces like strips, you can get interesting geometrical shapes that can appeal to any of your rooms.
Materials Required
- Wooden boards or scraps
- Saw
- Use of glue for wood
- Emery paper
- Paint or stain
Procedure:
Cut the wood: Cut the wood into the geometries. One can do this using a table saw or a miter saw to get clean cuts with precision in the angles. Use sandpaper to smooth out the edges of each piece, making sure it is not rough and will have a clean finish.
Arrange elements—Place the elements on a flat surface and experiment with several arrangements until you have one that you like.
Glue the elements together—When you like the look, then glue the different parts together. Allow the glue to dry completely before handling the piece.
Stain or paint the final product as per your desired decoration. You can pick one color for a neat, simple ending or use many colors to have a tantalizing display.
Pro-tip: For depth, use small pieces of wood to build the sections of the geometric shapes above the flat bottom surface in multiple levels.
2. Wooden Quote Signs
Inspirational Quote Signs – If you really want to bring inspiration and good attitude inside a place, a wooden-man quote signs from solid wood are perfect. Whether you want to show to the public your favorite sayings, leitmotif quotations, family names, the following signs will just deftly add a heart-warming touch inside a kind of place. Plus, easy to customize and perfect for gifting.
Materials:
- Wooden board
- Paint or stain
- Stencils or vinyl for wording
- Sandpaper
Instructions:
Sand the wooden board to have it prepped properly for paint or stain.
Paint or Stain the Board: You can paint or stain your board solid, in an ombre, or even in a distressed finish to go more for that rustic look.
Add the Quote: Once the finish is dried, add the quote you picked out by using stencils or vinyl lettering. Make sure to center and space the letters correctly for a clean and professional finish.
OPTIONAL DISTRESSING: Lightly sand the board edges or do a dry brush technique to give it that vintage or rustic look.
Tip: If you are feeling a tad artsy, go ahead and add some embellishments, like little wooden flowers, metal accents, or even a painted border that will further make the design more interesting and beautiful.
Get Your FREE Woodworking Guide Today!
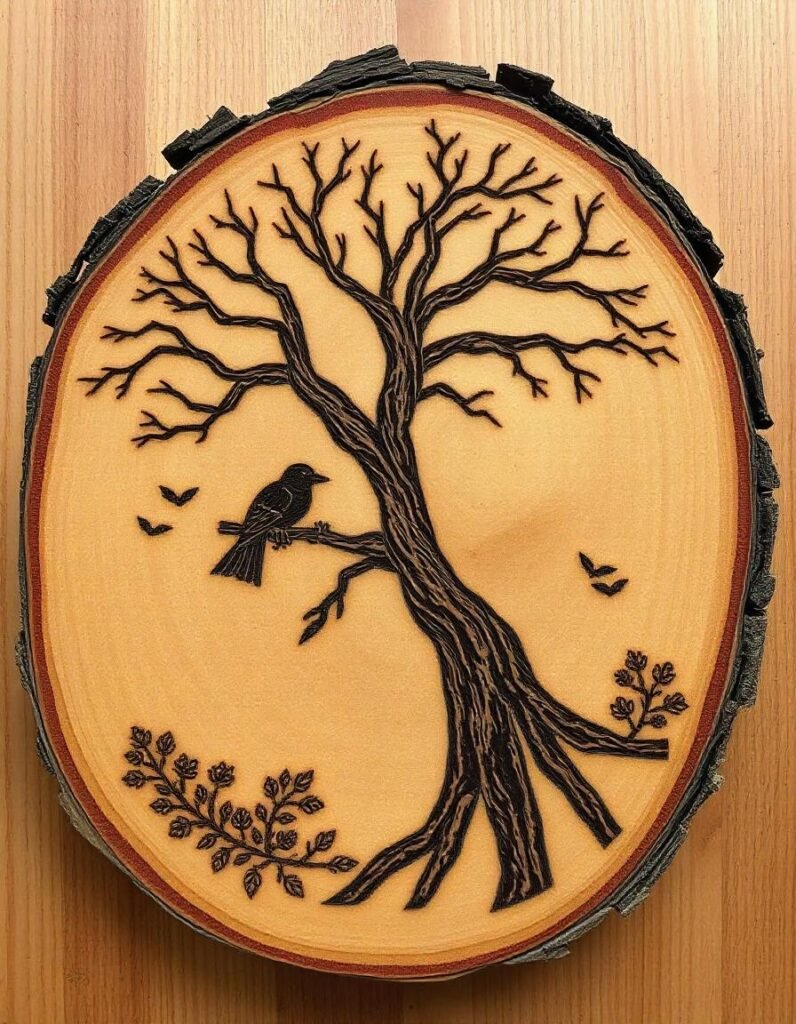
3. Wood Burnt Art
The art of decorating wooden objects, with this method also called pyrography, is an ancient form of using intense heat on wooden objects to make designs. This style of artwork is great for making images or even portraits look super-detailed by burning the details into the wood.
Materials
- Wooden board or plaque
- Wood burning tool
- Fine sandpaper
- Thin varnish or sealant (optional)
Instructions
Prepare Your Wood: Sand the surface wood to make it smooth with no splinters or blemishes. For good detail in wood burning, a smooth surface is ideal.
Develop Your Design: Either sketch very lightly on the wood area you want to design with a pencil or transfer an outline likeness to the surface from a printed image, with the use of carbon paper.
Burn the Design: Using a good wood burning tool, begin burning right on your design, with a consistent level of pressure so that the lines are consistent, whether in thickness or shading. Content experimenting with different tips and processes to develop various textures and detailed results.
Finish the Piece: After you have created the design, sand any rough edges and put a varnish or sealant over it to protect it from damage and let the natural beauty of the wood come through.
Tip: Before starting on the final work, get used to the wood burning tool and technique by practicing on a scrap wood.
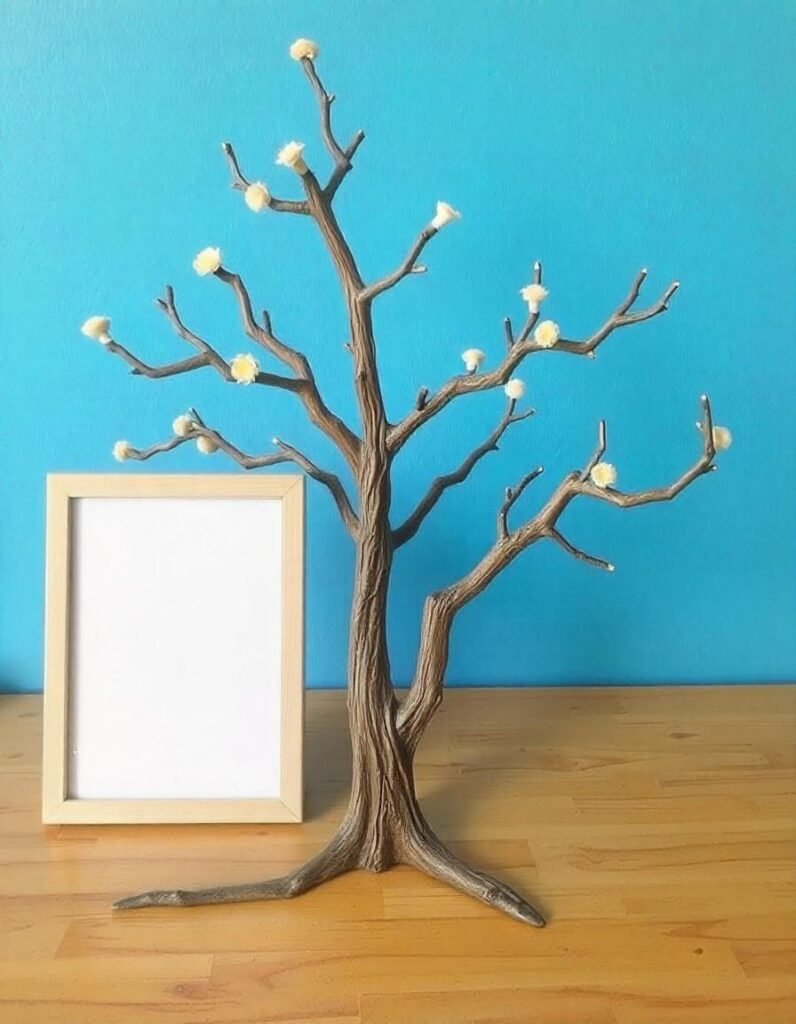
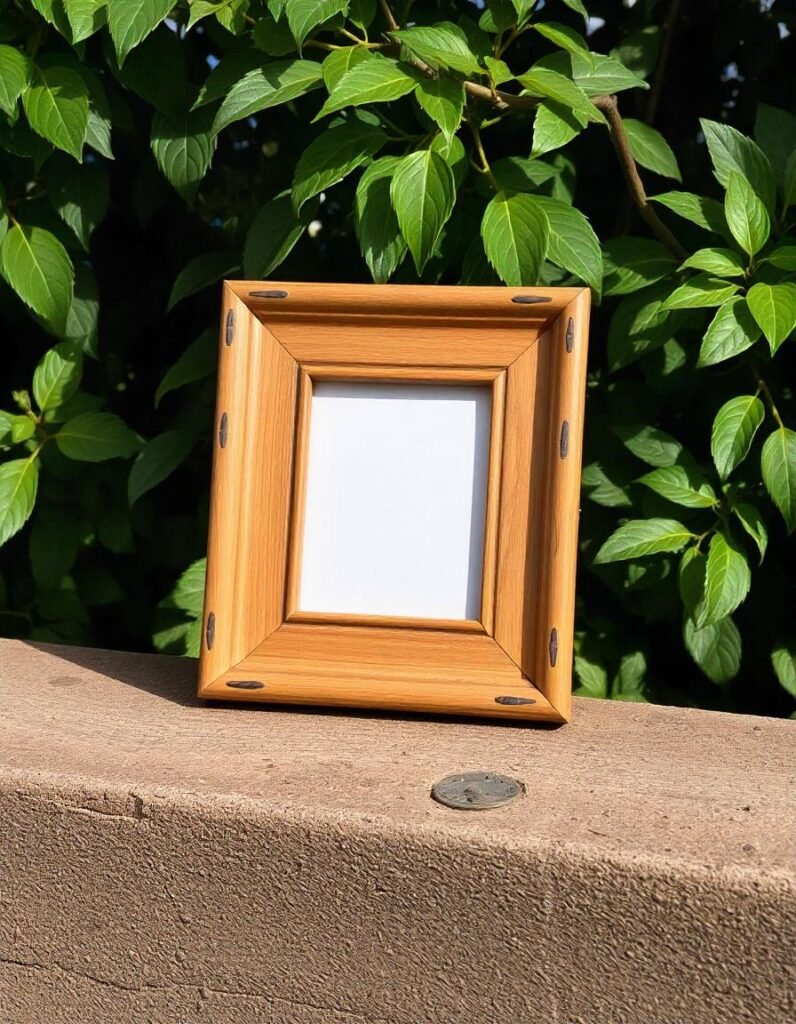
4. Wooden picture frame
Handcraft wooden picture frames to portray your photos and art in style. They can be customized to any size and style, from rustic and weathered to sleek and modern. They are also another great way to use up those Sherwood Forest cuts remaining from other projects.
Materials Needed:
- Wooden strips
- Saw
- Wood glue
- Clamps
- Sandpaper
- Paint or stain
Instructions:
Cut the Wood: Measure the size of the picture to be framed and cut the wood strips to that length. For a professional look, miter the corners with a 45-degree angle. Construct the Frame: Spread wood glue across the miter joint and clamp the pieces together. Check to see if the corner of the frame is square by measuring diagonally from corner to corner. Allow the glue to dry completely.
Sand the frame. Once everything is glued together and dried, sand the frame to ensure a smooth application of finish.
Stain or Paint: Finish by applying stain or paint to co-ordinate with your own decor. Maybe in carving some detail in the frame, or maybe in some inlays that you do in a layered paint technique that would be really unique.
Mount a backboard and glass to protect your photo, and think about adding some hanging hardware so it is ready to go on the wall.
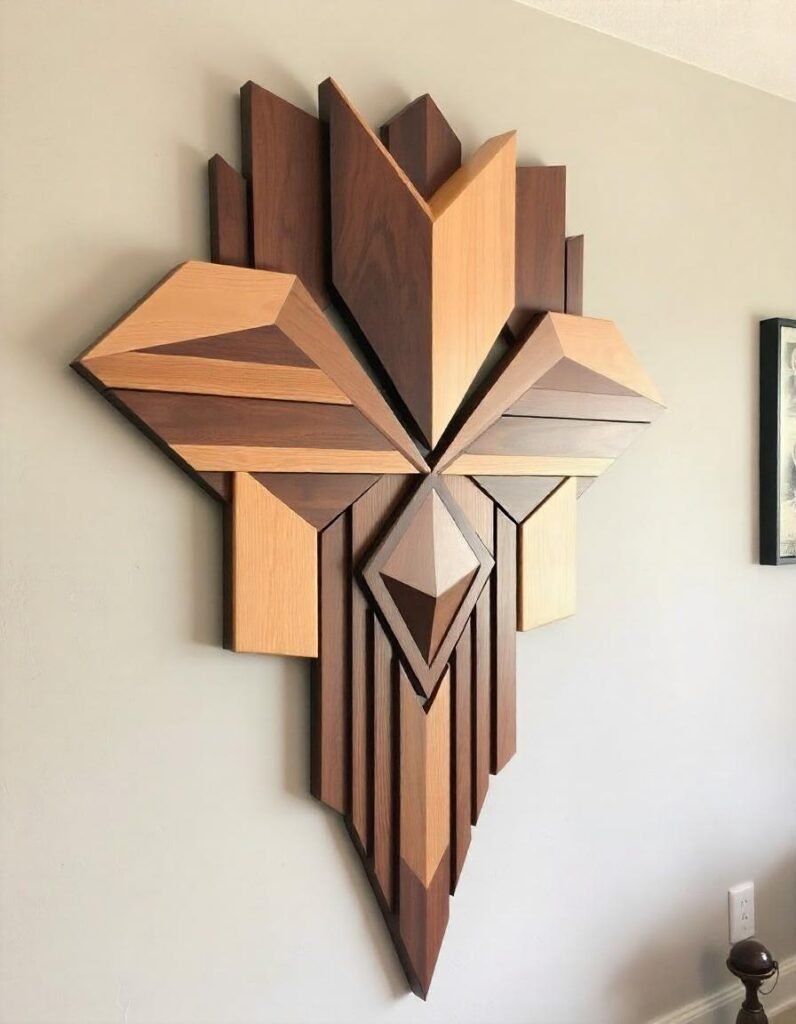
5. Abstract Wood Art Panels
Abstract wood art panels will bring texture and dimension to any wall. You can make a very impressive piece of art for a room by placing with varied size and shape wooden boards on a backing board.
Materials needed for this task:
- Boards – Different size of boards sized differently
- Saw
- Wood glue
- Sandpaper
- Paint, or stain
The Process:
Cut the Wood: Start by cutting the wood into variably shaped parts in different sizes. Have in mind how the various parts are going to fit to produce a pleasant, dynamic composition. Sand the Edges: Sand the respective edges of each with sandpaper so that you can fit together the other parts seamlessly.
Design: Lay all the different sized elements out on a plain surface and turn and test probable design ideas. Think about putting layers of some of the elements down to give some tone to the work.
Glue: Once the design is finalised place all of the elements onto a backboard and glue to a complete. Allow the glue to dry thoroughly.
Finish the work: Paint or stain all parts of the piece, or leave one section of it plain to create a contrast. Ensure the whole final work will resemble one overall design that would inject a certain element of art to your space.
Grind: Use contrasting colors or contrasting finishes to accent parts of the design. This makes the piece look more dynamic and engaging.
Get Your FREE Woodworking Guide Today!
6. Reclaimed Wood Art
Reclaimed wood art is not only a sustainable thing, but it also grants an item history and character that a newly minted piece of wood just cannot have. Whether you are using old barn wood, pallet wood, or just wood scraps that were left over from yet another project, reclaimed wood adds a touch of old-world charm to your art that is both in style and classic at the same time.
Supplies
- Reclaimed Wood
- Saws
- Nails or wood glue
- Sandpaper
- Paint/stain (optional)
- Hacksaw, jigsaw
- Paintbrush
- Ruler
Instructions
Prepare the Wood: Sand and clean the reclaimed wood to remove dirt, nails, or roughness. You would be aiming to retain the wood character and at the same time make it safe for use.
Cut the Wood: Whatever wood length you put in should be cut to size based on your design. Differing lengths, widths, and thicknesses could be used to great advantage to make it look interesting and stylish.
Design the Set: Arrange the cut pieces in the pattern you want: herringbone, random grouping, grid, or any other.
Set the Art: Join by laying the edges down with glue or using nails. If you want to give a better finish, put a frame to close the edges.
Optional Finishing: For the finish by design look, you could keep the color of the wood natural, pre-stain to even out the coloring, or final clear coat to protect the wood and add a natural shine.
Pro tip: Utilize the imperfection in the wood, like its knots, nail holes, or weathering of the material, to give the item its character and authenticity.
7. Mandala Wooden Art
Mandalas are popular for their geometric pattern and symbolic use of integration, harmony, and balance. Through this step, a wooden mandala is conjured up to add these hip qualities to your home and to boast your creative talents.
Materials:
- Wooden board
- Paint, stain, or carving tools
- Sandpaper
Instructions:
Prepare the Surface: Sand wooden board to a smoothness with which you are satisfied and ready to take on paint or carving.
Design Implementation: Using a template, draw or transfer a mandala design on your piece of wood. Find templates on websites; create your design, making sure it is symmetrical and the design is well-centered.
Carve or Paint: If carving, carefully follow the lines of your design with small carving tools. For painting, use fine brushes to apply paint on to in a steady controlled manner.
Finish Up the Project: Sand away edges, and afterwards coat the work with a protective barrier if the user would prefer what the barrier does is protect the wood and ensure the mandala remains beautiful for many years down the line.
Hint: What one can do is use a mixture of carving and painting, adding depths and contrasts which finally presents a more complicated mandala to look at.
8. Wood Carvings
Wooden sculptures can be composite to highly detailed with realism; there are numerous opportunities to articulate creative expressions with wooden sculptures. Sculptures can be the centerpiece of the room, imparting some kind of artistry and work into your home.
Materials:
- Blocks of hardwood
- Carving tools
- Sandpaper
- Varnish or sealant
Instructions:
The Selection of Wood This is the first step to making wooden sculptures. You have to select a piece of hardwood to help make your sculpture. Common varieties of hardwood that can be recommended are, oak, walnut, and mahogany.
Design Planning: Sketch on paper your sculpture that you have in mind or directly on your wood block, taking the direction of the grain into consideration and how it will affect your selected piece of wood.
Carving the Sculpture: Use your carving tools and start working methodically to be removing wood until you expose your desired shape. Use the larger tools to define the general shape and then fine tools for more detailed work.
Sand the sculpture: After carving, he should sand the sculpture. In this way, the surface becomes totally smooth to remove any rough edges that remain in the wood. Finish the piece: Varnish using a varnish or sealant to obtain that protection of the wood as well as to enhance the natural color and grain. This would also give the sculpture the look of a polished and finished piece.
Tip: The touch is to texturize and finish by leaving some areas rough and untreated and apply a patina. You will get a sculpture that is very alive and full of character.
Get Your FREE Woodworking Guide Today!
9. Wooden Wall Murals
Wooden wall murals are an innovative and daring way to convert a crude and boring wall into a piece of artwork full of awe. These creative projects can be as uncomplicated or as complex as desired and be worked up according to the mood or any particular design.
Materials Needed
- Wooden panels or planks
- Saw
- Wood glue or nails
- Paint or stain
- Sandpaper
Directions:
Design Your Mural: Plan your mural design on paper while considering the size of the wall and the overall aesthetic to be produced. Consider how different wood tones, textures, and finishes all work together for a coherent design, and then draw inspiration from it. Think through your design one more time, and then only proceed. Cut the Panels: Cut the wooden panels or planks to the sizes and shapes you desire according to your design. Sand edges for a smooth fit.
Plan the Panels: Prepare the panels only on the ground with the aim of ensuring they will align exactly as designed. Make all the corrections needed beforehand.
Apply the Panels: Begin by sticking the panels to the wall from the lowest row. Use wood glue or nails. Continue upwards by making a level, actual row for each panel.
Finish the Mural: Once you have all the panels in place, you could paint or stain the mural to add the dimension of aesthetics. Use a mix of finishes on the mural to increase depth and interest.
Tip: Use different materials, including metal accents, mirrors, or fabric, on your wooden mural for a more dynamic effect.
10. Wooden Clock
A functional and aesthetic décor, the wooden clock is a clock that displays mastery of each element in the room. Any room is transformable to livelier elegance with a hint of woodworking mastery. Irrespective of the design’s complexity, making a wooden clock can be a smooth exercise to shade more skills in timepieces.
Materials:
- Wooden panel or board
- Clock mechanism
- Drill
- Paint or paint and varnish
- Sandpaper
Instructions:
Design the Clock: Decide upon the shape and size for your clock. You could either go with a classic round shape or become a bit creative with more abstract or geometric design options.
Cut and Prepare the Wood: Cut the wooden sheet in the required size and shape. Sand the edges smooth in preparation for finishing.
Clock Mechanism Hole: Drill a hole in the centre of the board to the dimensions of the clock machination. Ensure the hole is of the right size to permit the shaft to pass through nicely.
Complete The Clock Face: Paint or varnish the clock face to your design. You can also add numbers, markers, or any other form of decoration that could create the personality to the clock face.
Attach the Clock Mechanism: Attach the clock mechanism to the back of the board, insert the hands, and adjust the time. Attach the mechanism according to the manufacturer’s instructions.
Hint: Don’t forget that you can also use decorative accessories such as metalized numbers, inlaid wood, or painted designs that allow your clock to be more impressive and different, as it is actually a work of clever hands.
Conclusion:
Wood art projects allow boundless creativity, making them special for personalization and enabling the realization of a project through something that will be a transformed raw piece of wood into something beautiful and unique. You can master a central piece for the living room, make a personal gift, or just enjoy the making in a possible artisanal process; these projects are going to be just great for an outlet of expression. Get the following, set everything up with these step-by-step instructions, and get ready to create wood art that will bring your living space alive while displaying your skills. As you work on the projects, you will both create something beautiful and acquire useful skills and experience that will motivate you to continue this great multitude of options for working with wood.
Get Your FREE Woodworking Guide Today!