
Ready to Master Woodworking? Claim Your Free Guide!
Wood crafting is a rewarding, multi-faceted adult hobby that not only allows
creativity and relaxation but also imparts practical skills. Whether one is an advanced
woodworker or just a novice in this field, there are countless projects in wood crafting to suit
all skill levels and interests. From practical furniture to decorative items for a home, and
personal gifts, working with wood opens doors for creative self-expression while honing your
skills. In the following post, we shall look at 10 creative wood crafting ideas that any adult
can easily try out with or without experience.
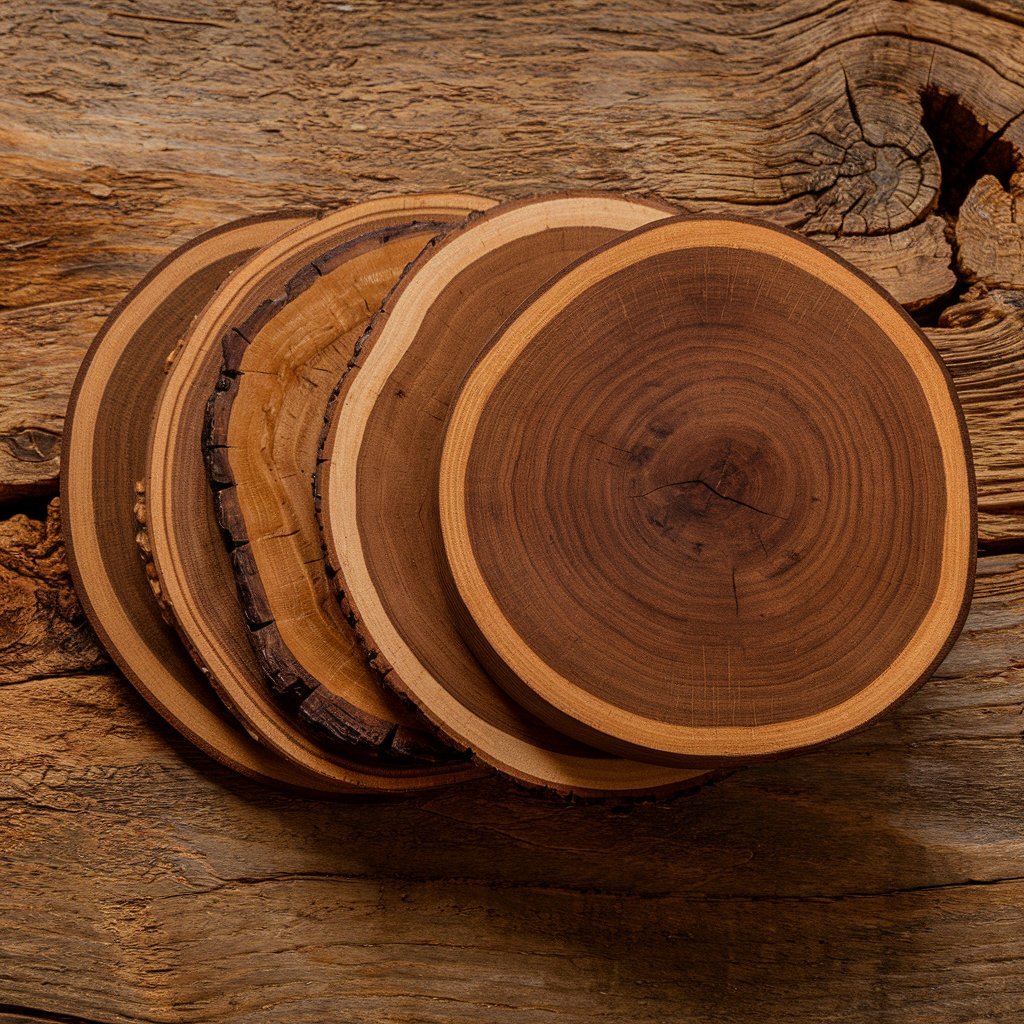
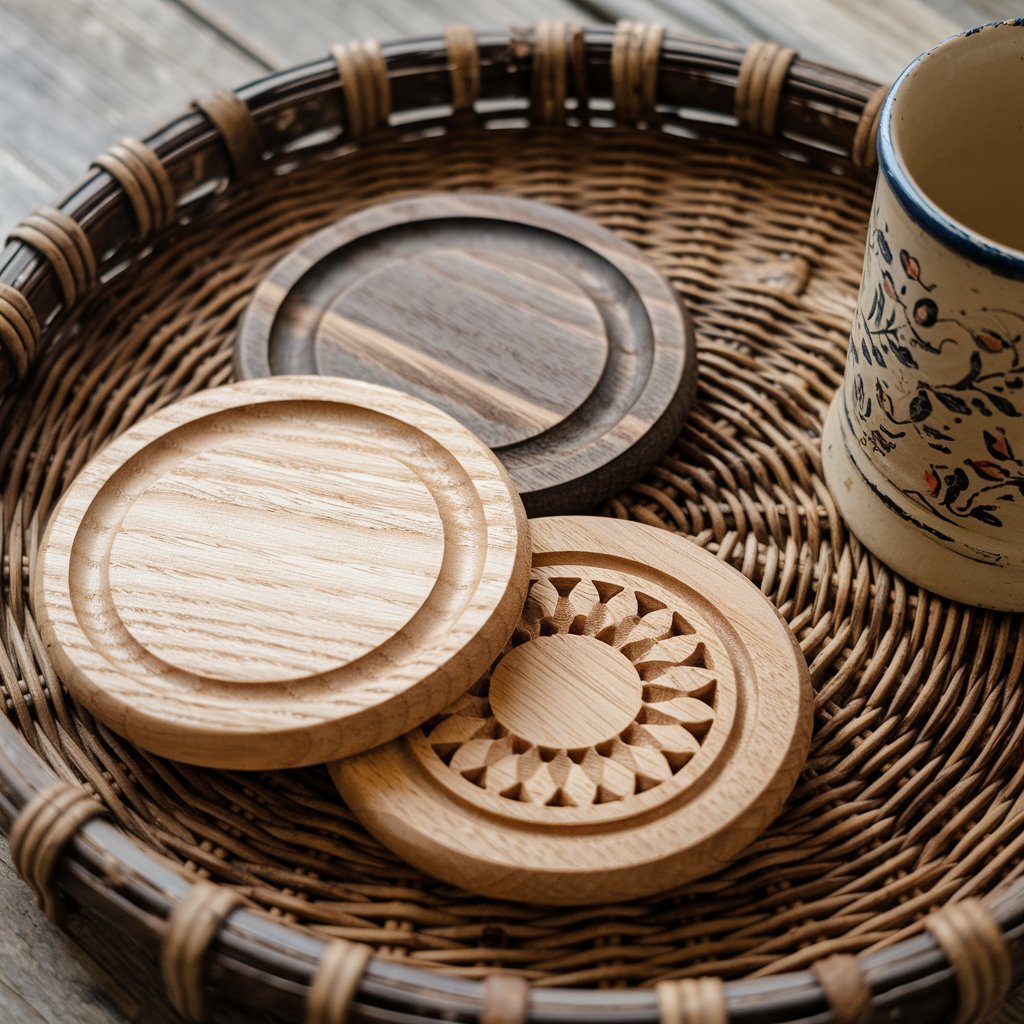
- Rustic Wooden Coasters
Why It’s a Great Project:
Coasters of wood are pretty simple to make and can be modified according to every taste.
They are ideal to protect surfaces from destruction and can add a rustic touch to your home.
This will be a great project for anyone starting out in woodworking because it requires very
few tools and minimal material waste.
You can use any other type of wood that you like, including oak, pine, or maple. Slice cuts
from the branches or use the pre-cut wooden circles which most craft shops sell. Use
medium-grit sandpaper and smoothen the edges; stain or paint to your liking to enhance wood
beauty. Apply a clear coat using polyurethane or water-resistant sealant over the wood to
protect it from moisture and wear.
Materials Needed:
Slices of wood, saw (in case you want to cut your own slices), sandpaper, stain or paint, clear
sealant
Insight: You can make personalized coasters by adding engravings of initial letters, painting
designs, or creating wood-burned patterns. You are also at liberty to use a wood-burning tool
that would show intricate designs or even monograms to make them uniquely yours, making
it a great gift to give to friends and family members.
- Wooden Picture Frames
Why It’s a Great Project:
Create a set of wood picture frames to hold your favorite photos or artwork. This is a very
simple afternoon project that is really perfect for beginners. You can also stain, paint, and add
decorative elements onto your picture frames to blend them with the other home decors.
How to Make It:
Miter saw with exact 45-degree angles for each corner of the desired frame size. Then, sand
the pieces to be smooth and assemble them with wood glue using corner clamps, which hold
them in place until the glue dries. Optionally, for extra stability, a few small nails or brads can
be sunk into each corner. End the framing with an attached backer board and glass. Consider
decorative edges with a router or adding moldings to give it an enhanced look.
Materials Needed:
Wood strips, miter saw, sandpaper, wood glue, corner clamps, nails or brads, glass, backer
board
Tip: Reclaimed wood presents a vintage, rustic character. It brings character and charm with
its naturally imperfect, knotted, and sometimes weathered look. Finish it off with wax or a
matte sealant to retain the texture and appearance of the wood naturally.
Ready to Master Woodworking? Claim Your Free Guide!
- Wood Burned Cutting Boards
Why It’s a Great Project:
Pyrography, also known as wood burning, makes functional kitchen items even more special,
such as cutting boards. It’s a pretty cool way to try out the artistic technique and give your
kitchen utensils and accessories a personal signature.

How to Make It:
Select a premium-quality hardwood cutting board, preferably of maple or walnut trees, which
are resistant to wear and tear and suitable to be in contact with food. Use a wood-burning tool
on the surface of the board. Start with simple designs, like geometric patterns or a monogram,
and get progressively more intricate, such as floral motifs or maybe even some sort of
wildlife scene. Sand smooth after burning to eliminate rough edges and finish with food-safe
oil to protect the wood and enhance the grain.
Materials Needed:
Wooden cutting board, wood burning tool, fine-grit sandpaper, food-safe oil-mineral oil or
beeswax
Practice first on a scrap piece of wood and work with your cutting board until you master the
technique for wood burning-so it allows controlled heat and pressure, cleaner lines, and more
precision.
- Floating Wall Shelves
Why It’s a Great Project:
Floating shelves not only serve a purpose for storage and display but also do so without the
bulkiness of hardware. This is an excellent addition to your home, especially if space is at a
premium, while still looking really clean and modern. The project is also highly customizable
by size, shape, and finish.
How to Make It:
Step 1: Cut the wood into desired size for your shelf-make all edges straight and smooth.
Then, sand the surfaces to prepare them for finishing. Attach hidden wall brackets to the back
of the shelves. Mount the shelves on the wall using screws and anchors, ensuring that the
surfaces are perfectly straight by means of a level. You may select different types of brackets
for your various preferences-from invisible brackets to wrought iron brackets for added
industrial machismo.
Materials Needed:
Wood boards, saw, sandpaper, wall brackets, screws, anchors, level
Tip: For an inset installation, stain or paint for color to match your interior. You may also
make a few of these and install them at different heights for a quirkier wall display. Floating
shelves also display plants, books, and other decorative items with ease, adding functionality
and style to any room.
- Wooden Jewelry Organizer
Why It’s a Great Project:
Organize your jewels and have them at your fingertips with this lovely wooden jewelry
organizer. This project will give you a great degree of customization, which will range from
the size and shape to type and the number of hooks and compartments. This is one fine
project to organize small items and showcase your woodworking skills all in one go.
How to Make It:
Cut wood pieces to create a frame, attach hooks or dowels to hang necklaces and earrings,
and stain or paint for finish. Attach small shelves or compartments to hold rings and bracelets
for additional storage. A decorative back panel, or even a mirror, may be attached to add
functionality and appeal.
Materials Needed:
Wood boards, saw, hooks or dowels, sandpaper, stain or paint, small hinges or brackets to
attach additional shelves
To add even more functionality and style, consider adding a mirror or embellishments, such
as wood-carved patterns or painted designs. You can also include a little tray at the bottom for
catching small items like earrings or rings.
Ready to Master Woodworking? Claim Your Free Guide!
- Plant Stands
Why It’s a Great Project:
Plant stands are an easy way to elevate your greenery and add some dimension to your space.
They avail a platform where one can showcase their plants while keeping them off the
ground, especially for rooms with very limited floor space or when you want to create some
focal points.
How to Make It:
Cut pieces of wood to desired height and assemble with screws or wood glue. Sand them
smooth and they can be finished by painting or staining to protect them from moisture. Make
several stands in different heights and group them for creating a tiered plant display that can
add so much depth and interest to a room.
Materials Needed:
Wood boards, saw, screws or wood glue, sandpaper, paint or stain
Tip: Make them more interesting by using a variety of heights and shapes. You can try
making them more modern using geometric shapes or do them more classically with round or
square bases. Apply a clear sealant to protect the wood against water damage, especially if
you will be placing the stands outdoors.
- Wooden Candle Holders
Why It’s a Great Project:
Wooden candle holders provide a cozy, natural accent to any part of your home. They’re
simple to make and can be made into various shapes and sizes for almost any setting or
occasion. This will be great for adding ambiance to your dining table, mantel, or even an
outdoor patio.
How to Make It:
Cut the wood into desirable sizes, insert holes for candles desired-tea light, votive, or taper
candles-sand to smooth, and finish with paint or stain. If desired, take it to the next level with
a router to add decorative edges or carve intricate patterns into the wood. Insert a metal insert
or lining inside to protect the wood from heat and wax drips.
Materials Needed:
Materials needed: Wood blocks, saw, drill, sandpaper, paint or stain, router, metal inserts
(optional)
Tip: Experiment with shapes and sizes to amass your collection. Make a set of matching
holders for uniformity or mix and match for an eclectic style. Apply different finishes or
metallic accents for added flair.
- DIY Wood Signs
Why It’s a Great Project:
Add a personal touch and some warmth to your home with wood signs. They can be
personalized, if desired, with quotes, family names, or designs, and they would make any
room perfect. This project also allows you to bring out your creative flair as you experiment
with various fonts, colors, and styles.
How to Make It:
Cut a wood board to size, then sand it smooth. Paint or stain the background of your design.
Stencil or freehand lettering onto your design, then finish with a clear coat over the wood and
paint to protect them. You could achieve a rustic effect by using a wood-burning tool or add
some embellishments, such as fake flowers or twine.
Materials Needed:
Wood board, saw, sandpaper, paint or stain, stencils, clear coat, wood-burning tool (optional)
Tip: Use reclaimed wood to really bring in that rustic farmhouse-style sign. Get creative with
it; try different fonts and colors to make it a one-of-a-kind piece. To complete your sign,
attach a frame of some type using contrasting wood or even metal.
- Wooden Serving Tray
Why It’s a Great Project:
Make this practical and decorative wood serving tray for entertaining or adding style to your
kitchen or living room. Trays are pretty versatile-they’re great at serving food and drinks, but
they also can make a great stylish centerpiece.
How to Make It:
Cut pieces to size, glue and nail together, sand and finish with paint or stain. Add handles for
easy carrying. You may also add a little decoration to give your design a bit of extra flair.
This could include metal corners, inlays or painted designs. If you will be using the tray to
hold food directly on the tray, you should use food-safe finishes.
Materials Needed:
Lumber, saw, wood glue, nails, sandpaper, paint or stain, handles, food-safe finish
Hint: Add a personal touch to the tray by adding a monogram or decorative pattern with
either a stencil or freehand design. It’s your touch and style that will make it unique. A raised
edge around the tray will keep things from falling off.
Ready to Master Woodworking? Claim Your Free Guide!
- Wood Block Calendar
Why It’s a Great Project:
The Wood Block Calendar is an interactive and fun way to keep track of the date and adds a
unique decorative element to any desk or shelf. It would also make for a great gift for friends
and family and offers a very creative alternative to the traditional calendar.
How to Make It:
Cut the wood blocks to size, and if desired, sand smooth and paint or stain. Using stencils or
stamps, add numbers and months to each block. This is an option to add small decorative
elements, such as flowers or seasonal motifs, to make the calendar more interesting.
Materials Needed:
Wood blocks, saw, sandpaper, paint or stain, stencils or stamps
You could also get creative by coloring one month in a different color from the rest. The other
great thing about this project is it is a fantastic way to practice your painting and stenciling
skills. You may want to include a matching base or holder for the blocks so they can stay
organized yet easily changeable.
Conclusion
There is no limit on what you can create or how you can personalize a wood crafting project.
Whether it’s functional items, such as cutting boards and plant stands, or purely decorative
pieces like wood signs and picture frames, these wood crafts for adults will surely bring
added flair into any home decoration while providing excellent opportunities to improve
one’s skills in woodworking. Each one offers different opportunities for new techniques,
different types of wood, and varied creative expression. Why not begin with these projects
and stand the satisfaction of creating with your hands something beautiful and unique?
In this presentation, these are further expanded to include details in instructions, as well as
tips and variations, so that this can truly become an overall guide to woodcraft projects that
can be enjoyed by adults, from beginners through proficient craftsmen.